
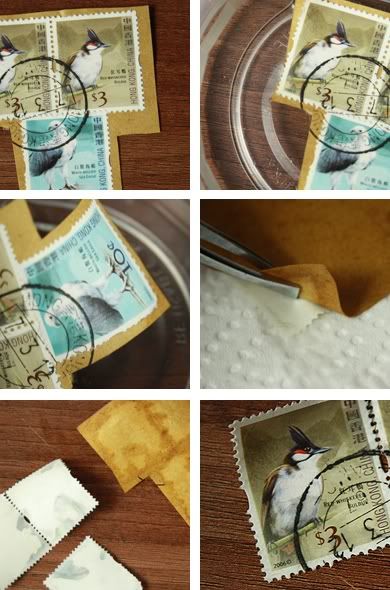
2. Grab a small shallow dish (I used a small container you normally find at deli's), fill it so there's just enough water for the stamp to float on without grazing the bottom, you also don't want it to be totally drenched. Use cool water, not hot or warm! Think of laundry, colours get a cold wash and whites get a hot wash. You don't want any ink to run.
3. My stamp upon touching the water started to curl, I panicked but it's okay. Just remove it with tweezers and just lightly flatten it out as best you can then place it back in the dish. Different envelopes and stamps will have different soak times so don't rush.
4. After about 10 minutes my stamp was ready and I removed it with tweezers, I peeled off the envelope with tweezers, it should almost slide off like a knife through butter. You might have to hold the stamp down as you peel away the envelope, but if you find that you're having to pull or it's not sliding off easily then stop and let it soak some more.
5 & 6. Let them dry completely before doing anything with them, if they curve a bit put them in a book to flatten them out. Now you can use them to decorate mail art or put in a stamp album.
Hope this helps in your snail mail needs!
<3 thank you!!
ReplyDelete